
Thursday, October 24, 2013
TeCH-Tuc: Android Wi-fi Hotspot-Limited Connectivity Solved
TeCH-Tuc: Android Wi-fi Hotspot-Limited Connectivity Solved: Mobile Hotspot or "Tethering", allows smart-phone's to share INTERNET connection with other devices like PC/Laptops etc. The...

Android Wi-fi Hotspot-Limited Connectivity Solved
Mobile Hotspot or "Tethering", allows smart-phone's to share INTERNET connection with other devices like PC/Laptops etc. The process simply involves enabling Wi-Fi hotspot on mobile and connecting laptop/PC to the wireless network connection of mobile.
However this simple process can sometimes become very challenging. You might face problem using mobile's wi-fi hotspot. In this post we will focus on very common problem/issue while using hotspot, and that is "LIMITED CONNECTIVITY" issue.
So now the case is, I am trying to connect my laptop to mobile's Hotspot , and i am enable to access internet. The network connection is unsuccessful, or it says limited connectivity or no Internet access.

Go to Wireless Network and check the Ip address, if it starts with 169.xx.xx it means laptop is unable to get proper Ip address. If this is the case, all we have to do is to assign Ip address in mobile and laptop. This is easy, Just follow steps mentioned below.
Assigning Ip address in Android device
1.) go to settings>wireless options>wifi settings
2.) now click on the menu button
3.) go to "Advance options"
4.) cick on set up Static IP address
5.) enter IP as 192.168.1.20
6.) enter subset mask : 255.255.255.0
7.) default gateway :192.168.1.1

Assigning Ip address in Laptop
1.Go to Wireless network connection> Properties>
Ipv4 Settings
2. Enter IP as 192.168.1.10
3. enter subset mask :
255.255.255.0
4. default gateway :192.168.1.1
5.preferred DNS network:
192.168.1.1
6.Click Close.
Thats it, You are done.
Dont forget to leave comments below.
Saturday, March 12, 2011
Secure Computer by ACCESS CONTROL
When sharing your computer with multiple users, deny assess to whole disk. Log in as an administrator to make changes
1. Go to properties of target local disk and select Security tab
Click Edit to change permissions

2.From the list select the users or groups to deny access to local disk.
If u dont see the target user/s in the list click Add

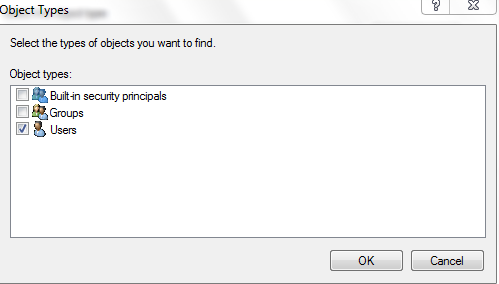
3. Click Object Types and check Users, see image 4
Then select Advanced tab
 |
 | |
|
4. Click Find now and select the target user from search results.
User is now added, go to step 2 to change permissions


6. Access denied. Job done
Wednesday, February 2, 2011
How to make a torrent file
Want to share some files with your friends and family or simply want to share content with the world. With torrent it is very easy but many people think making a torrent file is very challenging task. Here we will make a torrent file in three simple steps.
There are different torrent clients available, here we use utorrent client. The prcedure is same for any torrent client.
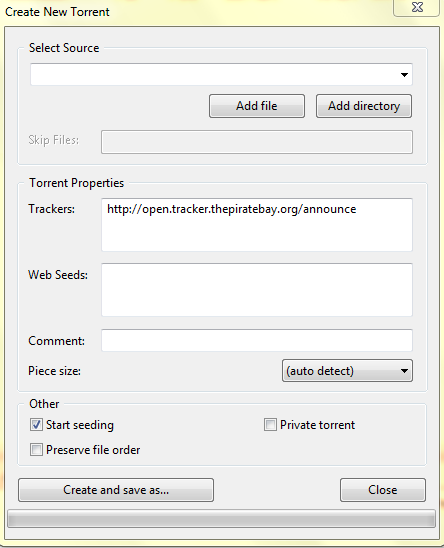
1. Open utorrent and click make new torrent (pencil like tab).

2. Select the file you want to share. Now in torrent properties enter tracker/s. Here people usually get confused. Just copy one or more trackers given below and paste in trackers.
http://open.tracker.thepiratebay.org/announce
http://www.torrent-downloads.to:2710/announce

3. Click create and save. Thats all.
4. Send torrent file to your friends or upload to any torrent site.
There are different torrent clients available, here we use utorrent client. The prcedure is same for any torrent client.
1. Open utorrent and click make new torrent (pencil like tab).

2. Select the file you want to share. Now in torrent properties enter tracker/s. Here people usually get confused. Just copy one or more trackers given below and paste in trackers.
http://open.tracker.thepiratebay.org/announce
http://www.torrent-downloads.to:2710/announce
http://denis.stalker.h3q.com:6969/announce
udp://denis.stalker.h3q.com:6969/announce
http://www.sumotracker.com/announce
3. Click create and save. Thats all.
4. Send torrent file to your friends or upload to any torrent site.
Tuesday, September 14, 2010
Hotmail Email Settings for Mobile
Go to Email settings and enter following:
Account name: Hotmail (or whatever name u like)
Connect using: given by your service provider
Email address: your email address, e.g [john@hotmail.com]
Connection type: Pop3
Incoming server: pop3.live.com
Username: again your email address, e.g [john@hotmail.com]
Password: xxxxxxxx
Outgoing server: smtp.live.com
Now go to advanced settings
(this is very important step, if you do not enter proper encryption settings you may not connect to server)
Encryption:
incoming: SSL
outgoing: SSL.
Feel free to comment.
Monday, September 13, 2010
How to to change the Google chrome language from Arabic to English
There are tutorials available to change the Google chrome language settings but the problem is we dont know the Arabic language. This howto tells the procedure that you can understand easily.
1. Open Google chrome and select the wrench icon. Then select the 4th option from the bottom.


1. Open Google chrome and select the wrench icon. Then select the 4th option from the bottom.

2. Select 3rd tab counting from right side and scroll down till you see the Gears tab. This tab is not of our concern. Select the tab that is immediately above the Gears tab.

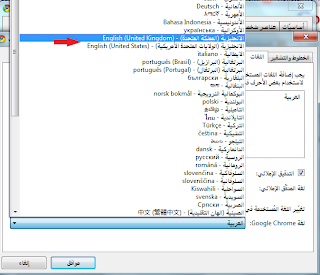
3. Select 2nd tab and go to the drop down menu at the bottom(shown in rectangular box). From this menu select English language.

4. Select the language you want to.

5. click ok

6. Again select ok and restart web browser. You are done.

Don't forget to leave comments.
Subscribe to:
Posts (Atom)